Rethinking my mobile photography workflow with iOS 14 and the Files app

Note: this article is written when iOS 13 was released and therefore is tailored to that version of iOS. Any of the steps mentioned also apply to iOS 14 though and might even be smoother as Apple improves the robustness of the Files app.
Using simplicity for speed
As you might know by now, I like keeping things simple. This is especially true when it comes to my photography gear and my whole process of making photos. My goal is be as involved in taking photos as I possibly can, and also take as much as I want to, without this resulting in me having to spend days behind my computer to make selects and edit them. As much as I enjoy a good edit, I don’t really want to spare hours on one photo. When I take a photo, I want that photo to already be very close to the end result. All I want to do is apply my edits and move on to the next one . This is especially true when I am away from home. When you are traveling, you want to be present and not look at a screen for a big part of your day.
The rule of ones
Therefore, I came up with a method to keep my whole photography workflow to one camera, preferably one lens, and an iPhone with at least iOS 13. I have been working for some time with this method and I have been able to simplify it to the point where I no longer have to jump through several hoops to make it work. The process is basically just as easy as it is on my laptop. Let me talk you through it, starting with:
Setting up my workflow
The moment Apple decided to upgrade the Files app to allow for external storage, including SD cards, a thought popped into my mind: would I now be able to basically mimic my laptop workflow on my phone? To answer this question, I first have to tell you a little about my workflow on my laptop computer which I treat as my base station.
My base station
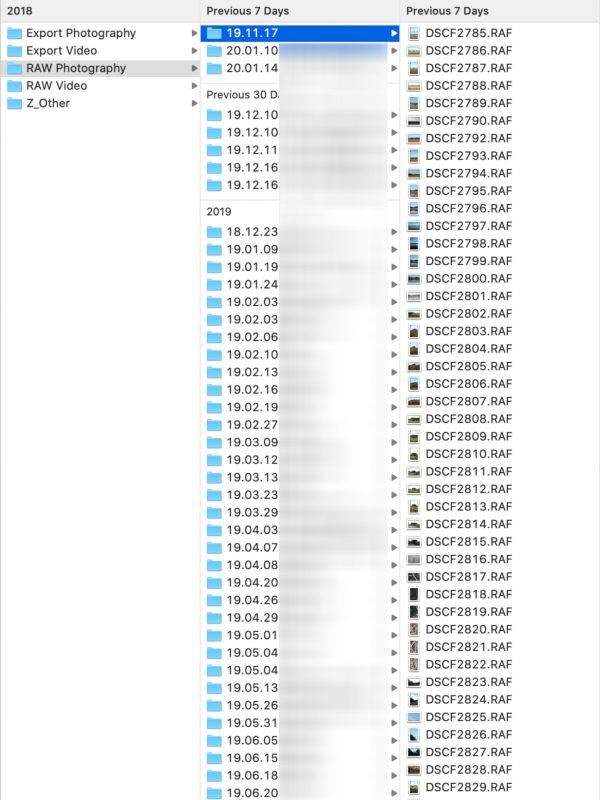
The setup I use to center my complete photography business around is: a MacBook Pro, with an external SD card reader and a LaCie 5TB HDD eternal harddrive. I keep a file structure on my LaCie HDD where I have a folder for my RAW photography, ordered by date, and I have a folder for my exports, also ordered by date. I import my RAW images from the SD card into its designated folder, I import these files into Lightroom Classic CC from the RAW folder and then export my edits to its own place in my exports folder. There are other, perhaps even better, ways to do this but this has worked for me for some years now so I’ll probably stick with it for a while still.
An iPhone, iOS 13 and up, the Files app
As I mentioned, Apple added external storage support in iOS 13 so I asked myself, would I be able to easily copy this exact workflow to my iPhone now? That means, without having to use multiple third-party apps and without having to go through the camera roll first to import the photos. The answer to this question is: yes, it’s surprisingly easy to maintain the exact same workflow on whichever computer I had use. For this to work, you need a few things
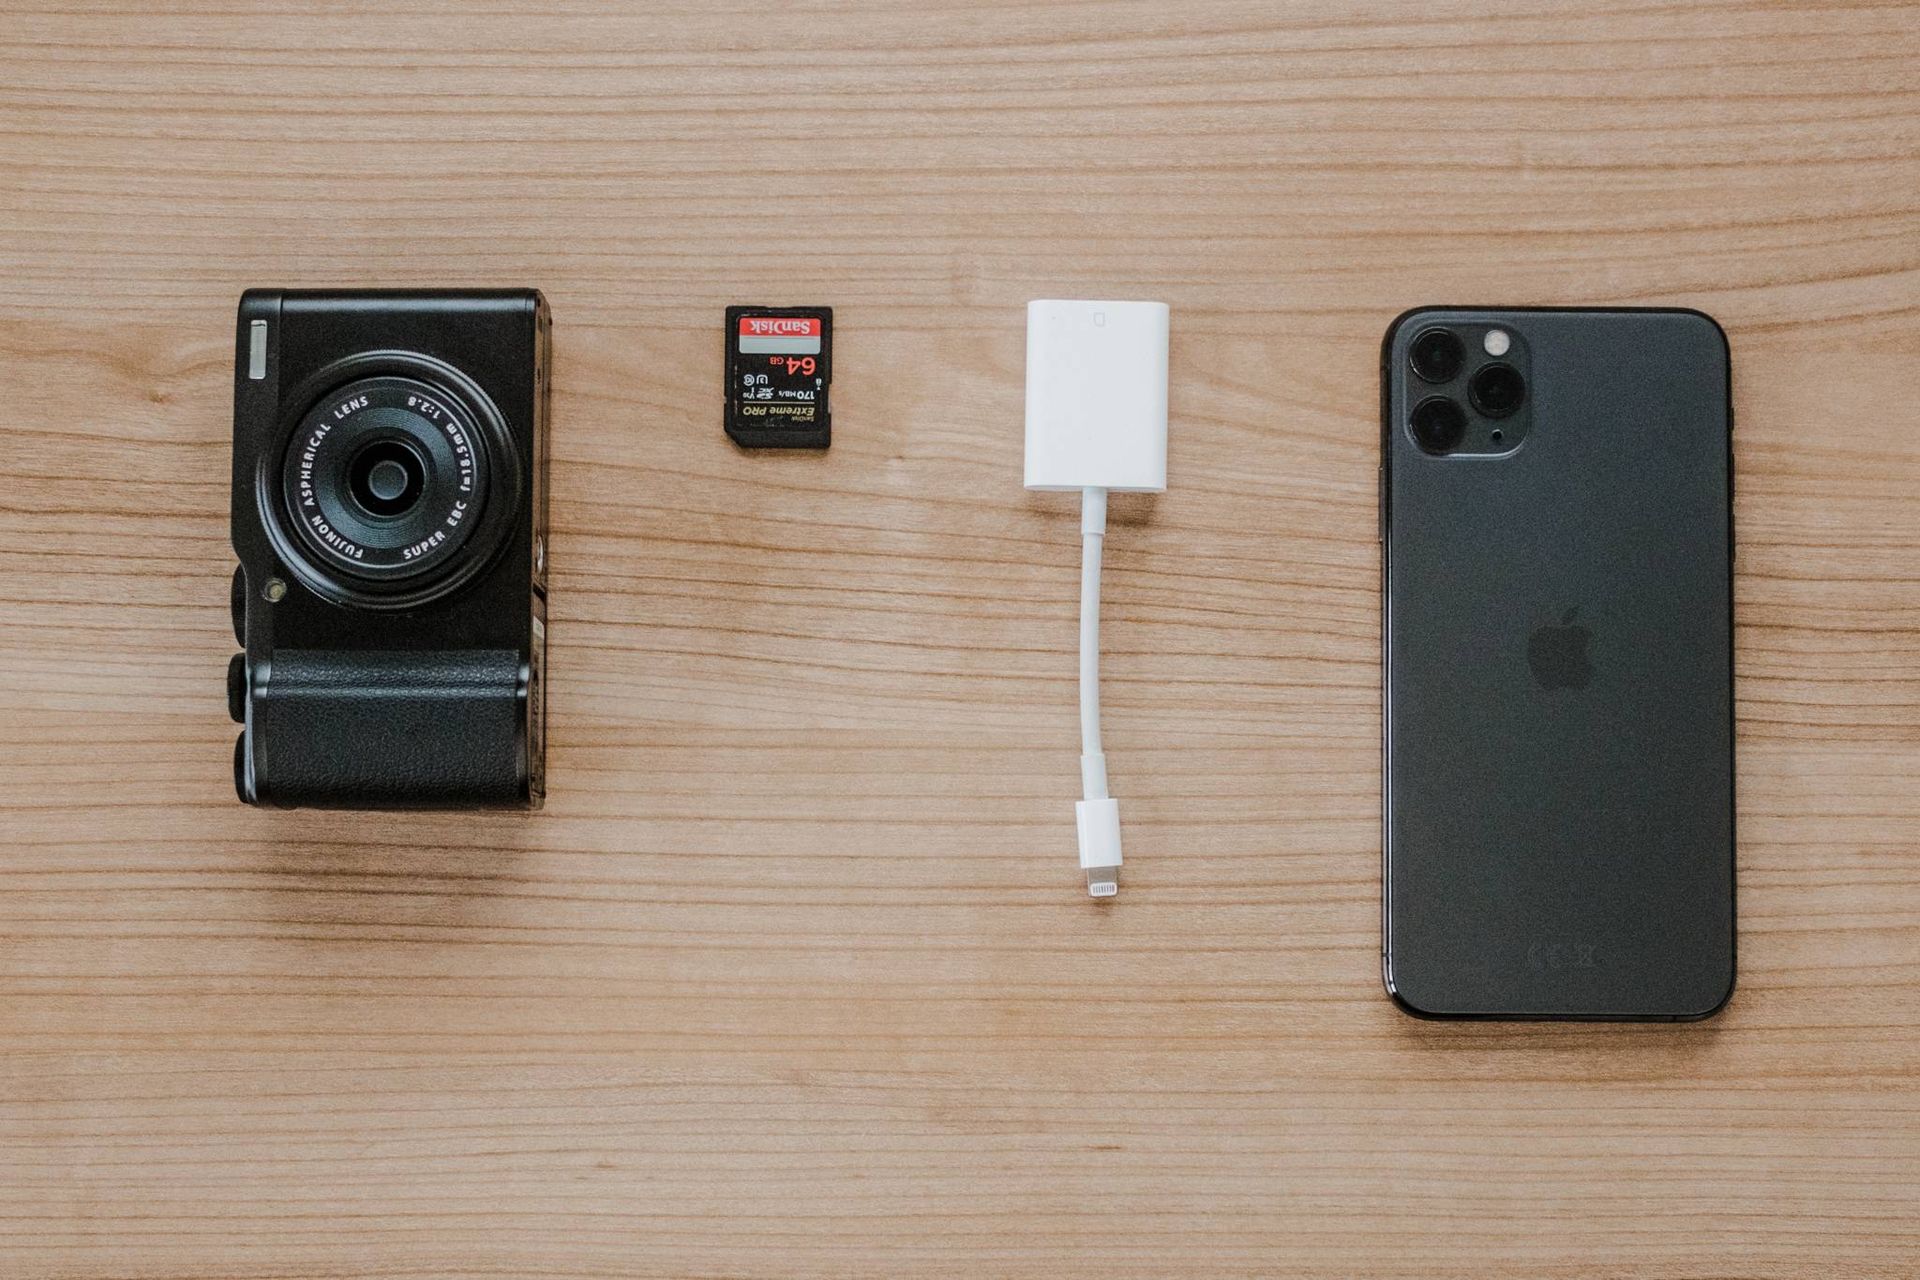
- An iPhone that has at least iOS 13 installed (Any iPhone from the 6s and up qualifies but I found it works smoother on newer phones)
- A camera that can hold regular sized SD cards (or a micro SD in an adapter)
- The Apple SD card to Lighting connector adapter
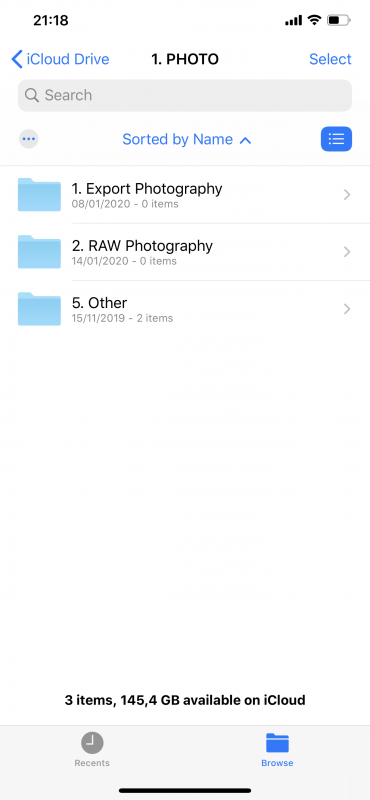
What I have then done inside the Apple Files app, is make a copy of the file structure I have on my MacBook. I recreated the exact same folder names and I use the same naming conventions to keep it organised. This isn’t truly necessary for this workflow to actually function, but I find it’s way easier to keep track of everything if you just stick to one system as much as you can.
I also keep iCloud Drive syncing enabled to allow for the files to be backed up immediately after the import as well. This makes it easier to catalog my work in a further stage but more about that later. For now, all the setting up is done and I can enjoy shooting my photos.
My photography workflow away from base
Once I completed shooting my photos for the day, I am ready to start my editing process. For this process to work you will need:
- The Files app, with access to sufficient storage. This can be local storage or you can use iCloud. Do make sure you have sufficient space for the file import as it might take a while for the files to be uploaded to iCloud. Also, you will need to have files offline for editing.
- Your preferred mobile editing app. I use Adobe Lightroom CC, as the app has greatly improved over the past few years and I it helps me to stay as close to my base station workflow as possible. You can use any other app that has access to the Files app for file management.
Storing and backing up the RAW files
To get started, I pop out my SD card from my camera, plug it into the Apple SD card to Lightning adapter, which I then plug into the Lightning port of my iPhone. I open up the Files app and create a designated folder first. The reason I do this first is that I don’t like having a full SD card worth of photography on my clipboard while I am still fiddling with my folder creation. The moment I go into the SD card to select the images for copying to Files, I want to go through copy-pasting in as little steps as possible. I don’t want anything to unexpectedly crash on me when I am handeling my, at this point, only copy of the image files. This might be overly cautious, but I am rather safe than sorry and my caution is warranted as I did have some crashes happen at this exact moment. I just don’t want have all these images ready to be moved and when the app crashes have it decide it should take down the original files as well. Luckily this never resulted in any lost files, yet.
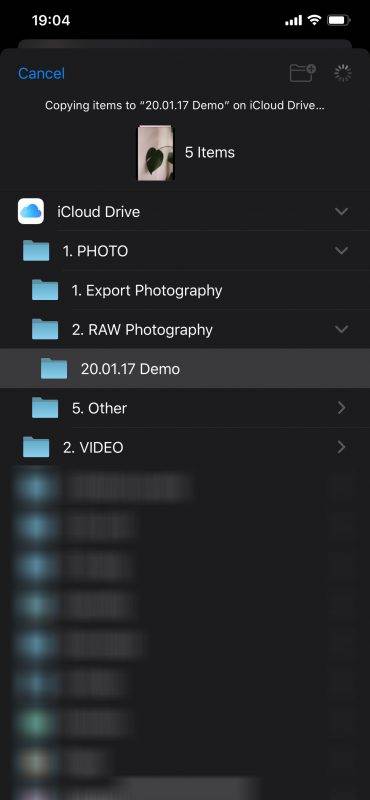
When the folder is created, I copy all the images I want from the SD card and paste them inside the folder I just created. If you have a lot of photos, this might take a while and there is no real way for you to tell how far along the transfer is. I hope Apple include some sort of progress bar as they have on the Mac. For now, just know that the Lightning port on iPhones is USB 2.0 still, which transfers files with a speed of around 25 MB/s to 35 MB/s. This is fast enough for me, as it takes just a few minutes to import a day’s worth of photos but I knowing this can be done in seconds on a faster connector hurts a little.
Also, when the app encounters files already in place with the same name, it won’t ask you to overwrite, merge or save duplicates. It just saves duplicates and that’s what you’ll have to deal with. This is especially inconvenient when you import your photos during lunch, use the SD card for the rest of the day, and then import the new files from the afternoon as well. You will end up with your original imports from the morning saved twice, accompanied by your freshly imported files from your afternoon. Of course you can combat this by simply selecting your files from the afternoon only, but I don’t feel like scrolling through a few hundred photos just to see what I did and what I didn’t import already. Anyway, moving on.
Editing the photos on the go
As soon as I have my RAW images stored safely inside the Files app, I unplug the SD card reader again as we won’t be using that anymore for now. As I mentioned, I use Lightroom CC on my iPhone to make my edits but you can use any editing app of your preference. I will focus my attention specifically on my personal workflow though.
For a while now, it has been possible to import your images from the Files app to Lightroom CC. I import the files from the folder I just copied them to and add them to an album under the same name. How I edit my photos is something I will write about in the future so I won’t get into depth about that for now. All we care about now is how the workflow as a whole is structured. I do want to point out that I also sync my own presets that I’ve created in Lightroom Classic on my computer to Lightroom CC. This way I can still easily edit the photos with consistency in the style that I like. On a basic edit, all I have to do is apply the preset I like to get the preferred colours and adjust the exposure accordingly.
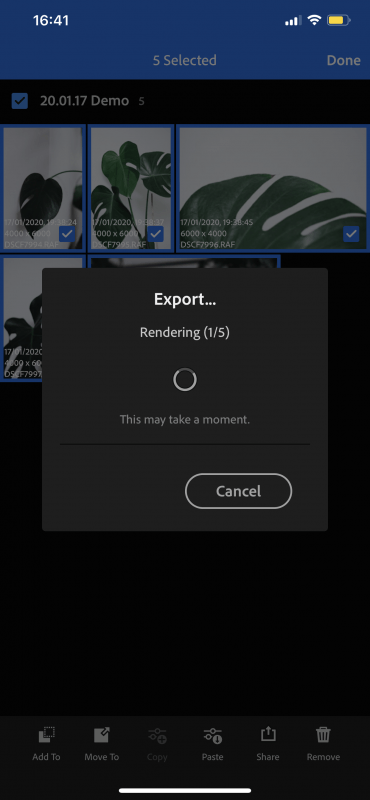
After I have made my selects and edited those photos, I select all of them and prepare them for export. To do this, you press the ‘share’ button and select ‘Save to Files’. Once I have chosen how I wish to export the photos, the images will render and you will be asked where the files should be saved. As you might’ve guessed by now, I navigate to the ‘Exports’ folder I created earlier and create a new folder for this particular set of photos. This is where I then save the files. After I’ve done this, I am done with all the work I have to do when I am away from home and I can get back to enjoying wherever I am at that moment.
Finishing up the file management
So I enjoyed my travels, documented everything with my camera and even managed to complete my editing work on the drive/flight/boat back home, awesome! Now I don’t have to return from a trip, only to sit at my computer for a few days straight to go through all my photos and start editing them. This also evades the situation that I’ve already lost some of the connection I had with my travel destination when I was still there. There is one final thing I can do to perfect my file management though.
As I described above, my base station is a MacBook with a 5 TB LaCie HDD plugged in. This external drive is then backed up constantly to Backblaze. At this point, we still only have our files in the Files app and iCloud. We wish to change that as iCloud storage isn’t that cheap but mostly isn’t nearly sufficiently spacious enough to keep many years of photography in it. Therefore, an external HDD that’s backing up to Backblaze is the perfect solution for me. External storage is relatively cheap and the fact that I can back up the complete drive (or several, Backblaze backup space is unlimited) to Backblaze, gives me peace of mind.
To easily transfer my files from my iPhone to my external HDD I have made sure to enable iCloud Drive on my MacBook as well. The moment I return to my home, there is a good chance the files are already waiting for me on my MacBook. The only thing that’s left to do for me is to go into my iCloud Drive on my MacBook, locate the folders I have stored the RAW files and the JPEG exports and move each of those in their corresponding folders on my LaCie drive. The fact that they are named the same makes this the easiest this task can be. After the files are stored on the drive and backed up to Backblaze, you can safely remove the files from your iCloud Drive again to free up space for your next adventure!
Final thoughts
Now that I’ve taught you my complete mobile photography workflow, you might still wonder: why? Why would you go through all this trouble to try and make your workflow fit a mobile device when you can simply bring your MacBook with you and just stick to one method that has proven itself to you? The reason is real simple, I don’t want to bring my MacBook traveling. Just as I don’t want to be distracted by my camera and usually only keep one lens on it, I don’t want to be distracted with doing computer work when I should be experiencing the surroundings of wherever I might be.
Moving my entire workflow to a mobile device, removes the work from the equation and instead, makes it a lot more fun to edit my photos on the go. I can produce final images on moments where I might not have much on my hands for example when I am on a bus for a few hours.
All this allows me to be present in the moment whenever I need to be, while also providing me with the knowledge that I am being productive and won’t have a pile of work waiting on me when I get back home. To me, that provides me with a lot of peace of mind and I think that if there is any state you should strive for, it’s exactly that.
Just you, me, and some occasional notes from the field. No spam.
Member discussion